
Ever feel like your garden’s missing something? Like it’s got all the charm, but not quite enough magic? I used to feel the same way—until one morning, while sipping coffee, I watched a tiny hummingbird hover mid-air, wings whirring like a heartbeat, dipping its needle-thin beak into a neighbor’s feeder. That was it. I was hooked.
DIY hummingbird feeders aren’t just about saving money or being crafty—they’re about inviting wonder into your space. And I promise, once you hang your first homemade feeder, you’ll never look at your garden the same way again.
1. Wine Bottle Hummingbird Feeder
A lonely wine bottle sitting in the recycling bin? Don’t toss it—transform it. Clean the bottle thoroughly, then fit a feeding tube with a stopper into the neck (these are easy to find online or at garden stores).
Fill it with nectar, hang it upside down using sturdy wire or a copper holder, and you’ve got a sleek, glass feeder that looks almost like garden art. Bonus points if you use colored glass that catches the sun.
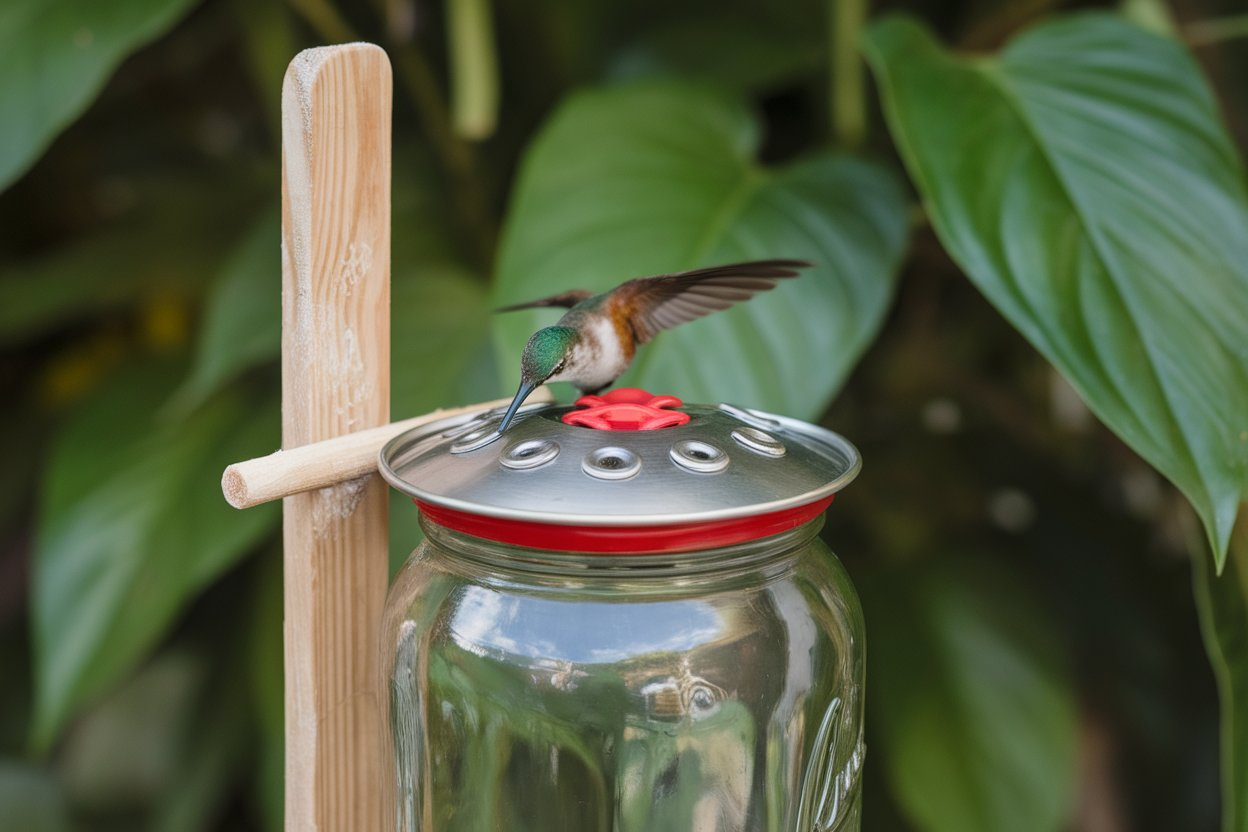
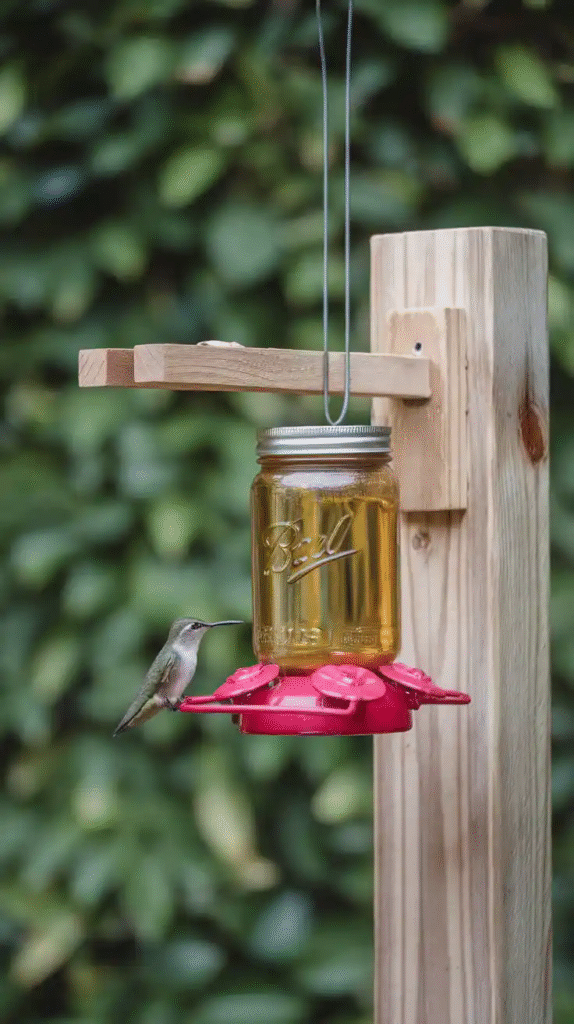
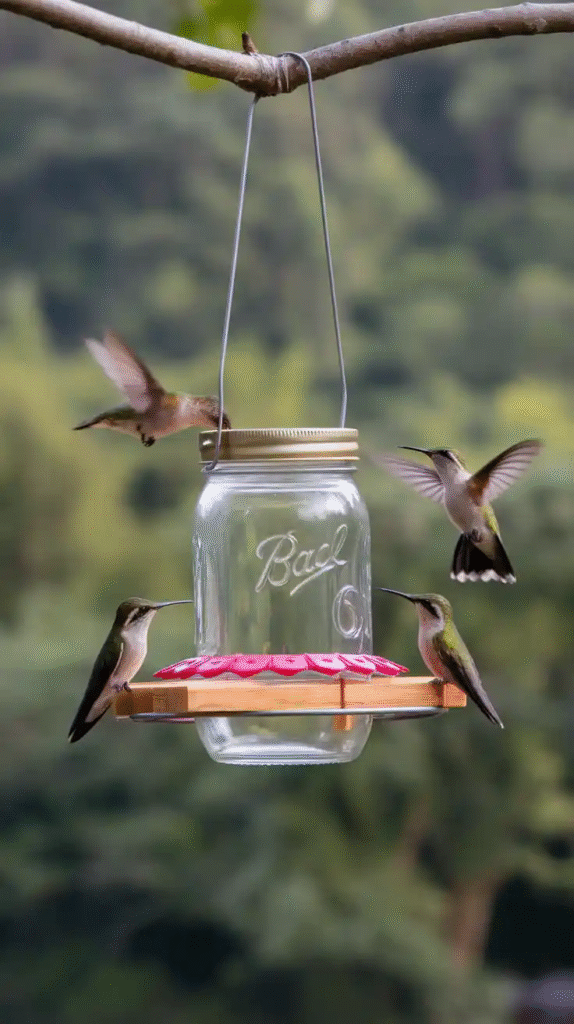
2. Mason Jar Feeder
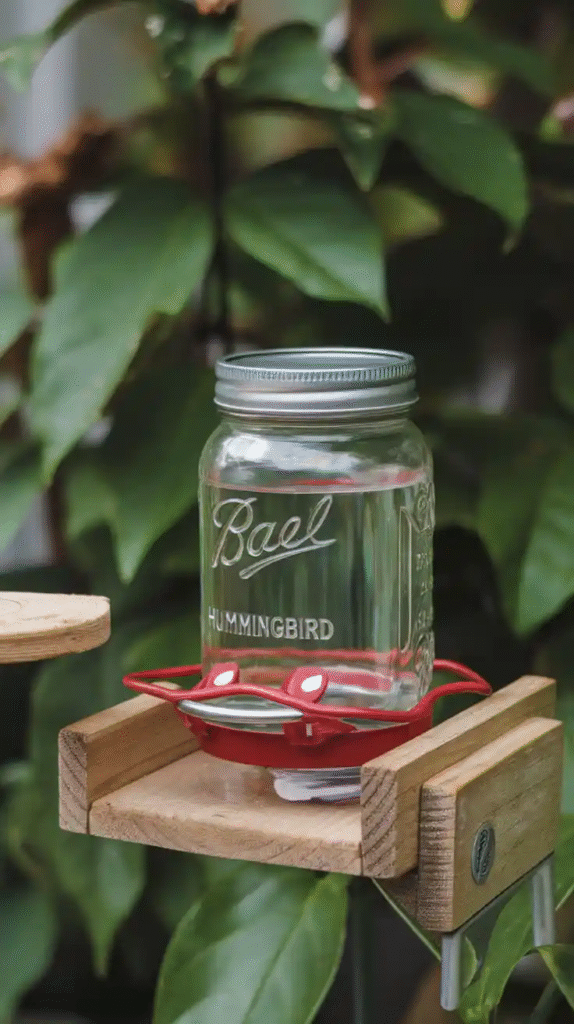
If you’re like me, mason jars seem to multiply in the cabinet. Put them to good use. Buy a mason jar feeder attachment, or make your own lid with drilled holes and rubber gaskets.
Decorate the jar with weather-resistant paint or keep it clear for a rustic vibe. The wide mouth makes for easy refilling—something you’ll appreciate when your new friends become regulars.
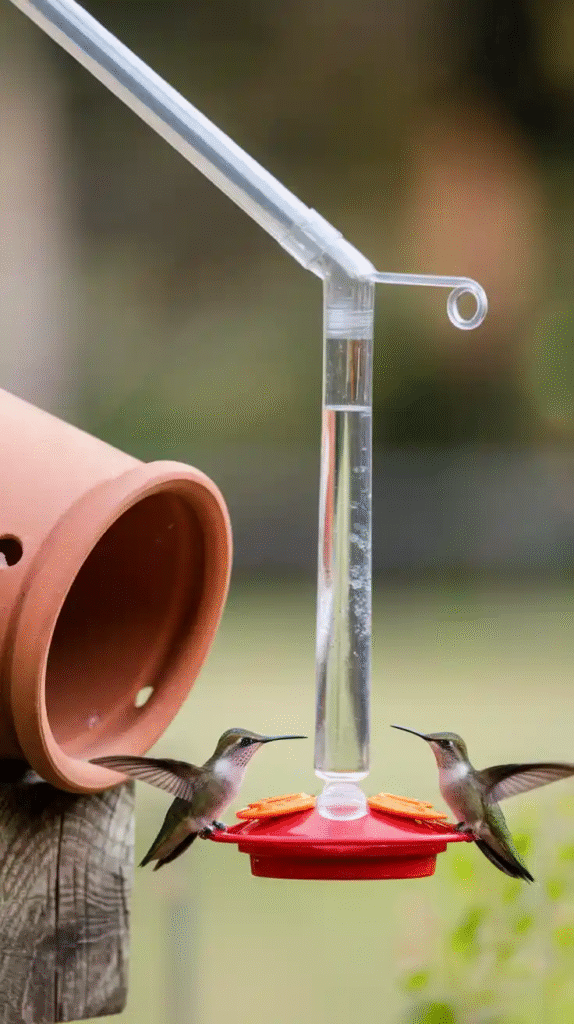
3. Test Tube Feeder
Sounds scientific, but it’s surprisingly pretty. Secure 2–3 clear test tubes to a piece of driftwood or a decorative branch using floral wire or copper loops. Add tiny rubber stoppers with feeding tips. Hang it vertically. The tubes give it a sleek, modern look, and you can easily monitor nectar levels.
4. Upcycled Perfume Bottle Feeder
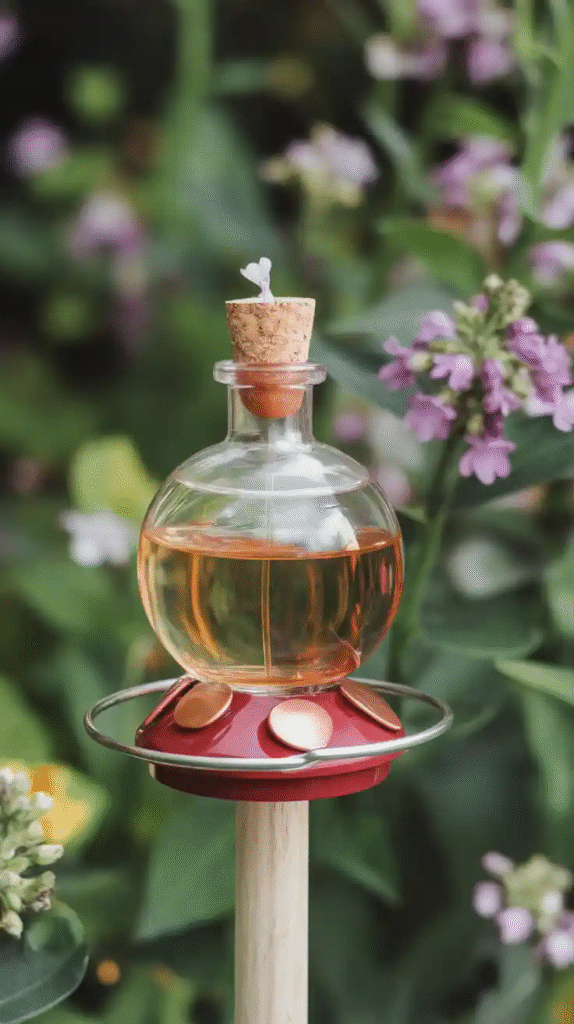
Ever finish a perfume and feel guilty throwing away the beautiful glass bottle? Here’s your excuse to save them. Clean them out thoroughly, remove any atomizer mechanisms, and add a feeder tube. Their small size is perfect for hummingbirds, and the fancy shapes turn your backyard into a floral runway.
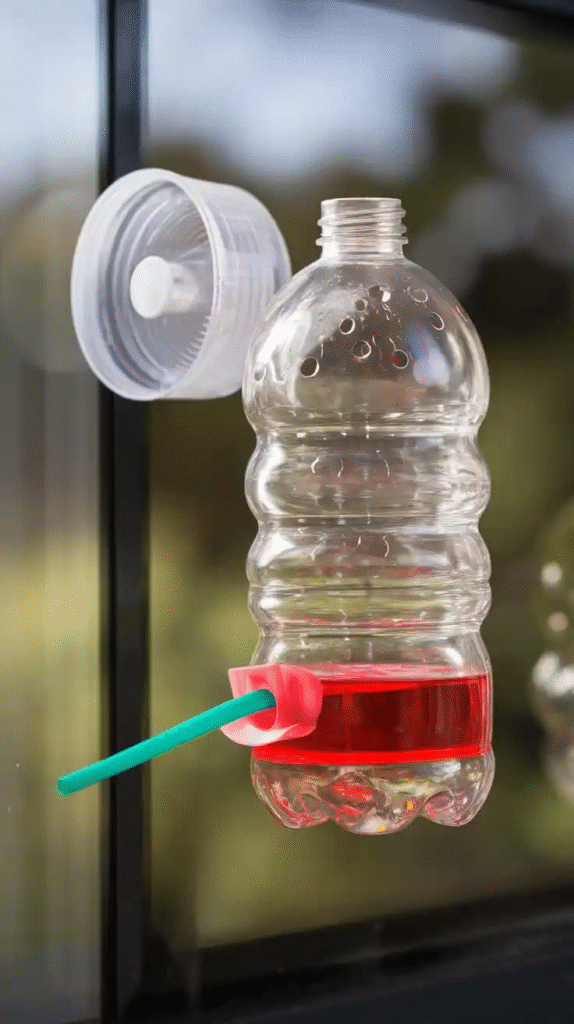
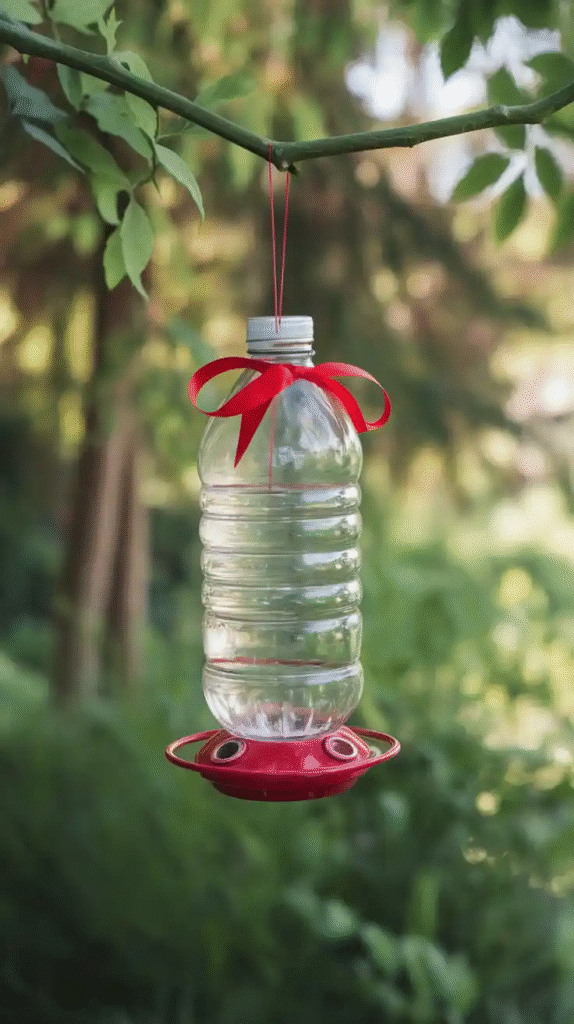
5. Plastic Bottle Feeder
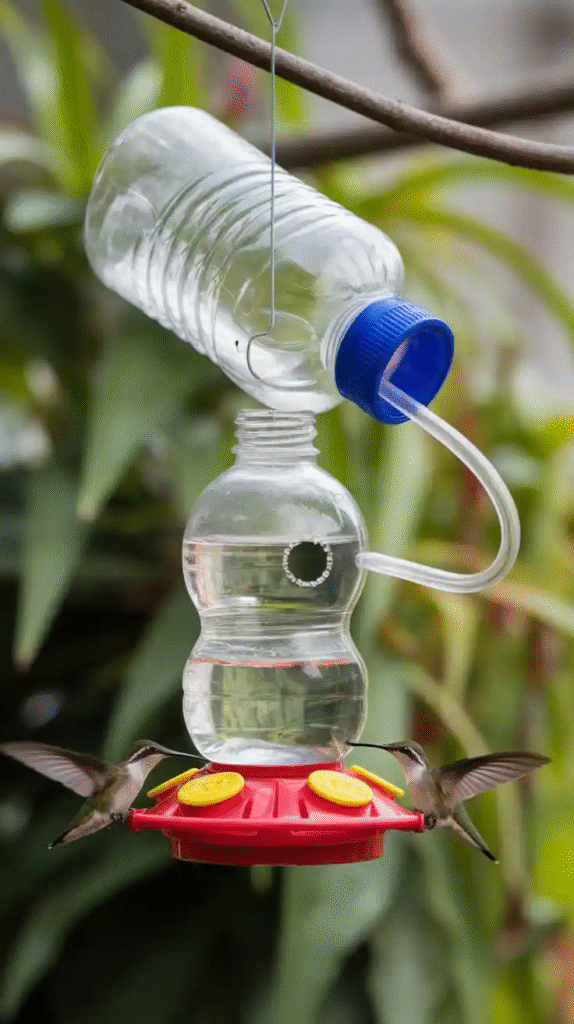
One of the easiest and most accessible options. Take a clean plastic soda or water bottle, drill or poke a small hole into the cap, insert a feeder tube, and flip it upside down into a tray. Decorate with waterproof paint or faux flowers. It’s lightweight, simple, and great for kids’ projects.
6. Teacup and Saucer Feeder
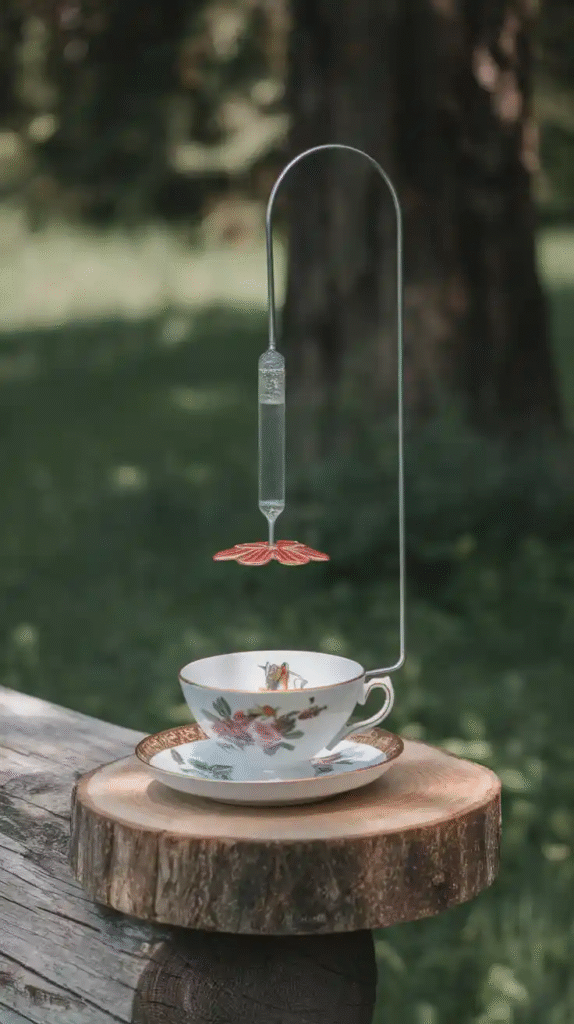
This one’s a personal favorite. I made one using a chipped teacup from my grandmother’s collection. Glue the teacup to its saucer (sideways or upright), attach a chain or wire to hang it, and fill the cup with nectar.
Add some red plastic flowers for attracting attention. It’s whimsical, nostalgic, and absolutely charming.
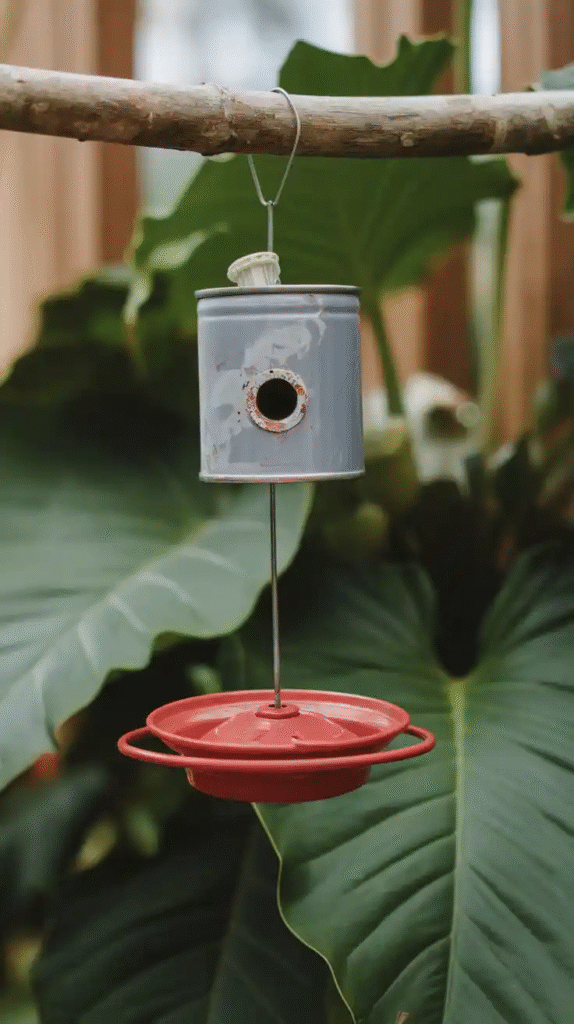
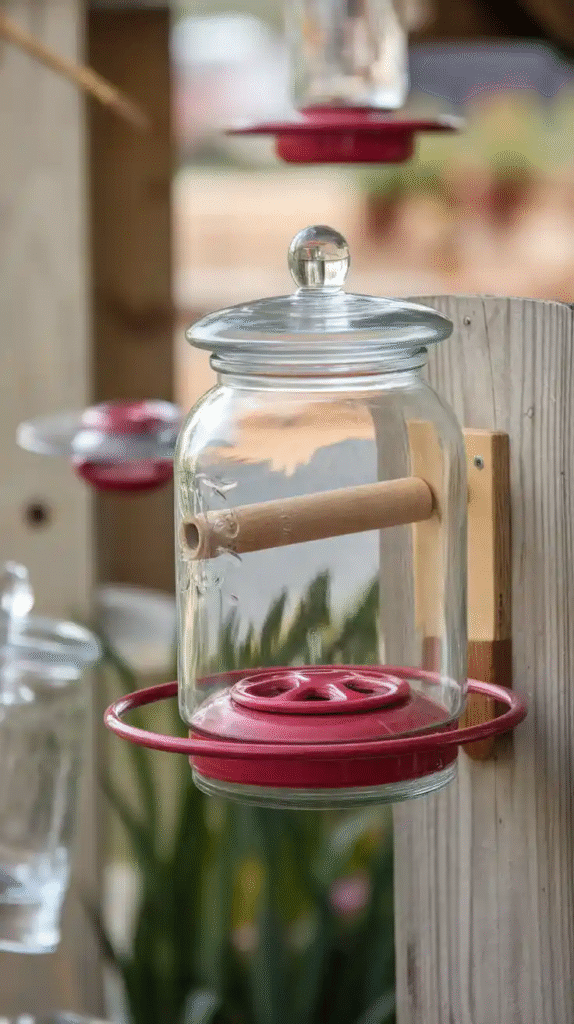
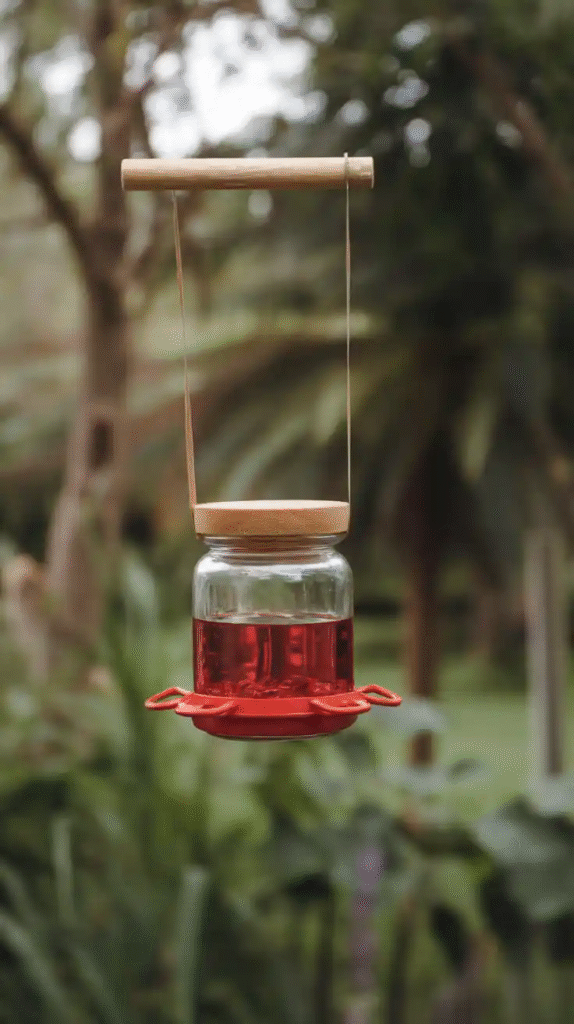
7. Baby Food Jar Feeder

Small, easy to clean, and just the right size for a single hummingbird stop. Drill or poke holes into the metal lid, insert a mini feeding port, and hang it with wire or string. Add red ribbon or paint to draw attention. These are so quick to make, you could set up a whole station of them.
8. Chandelier Feeder Station
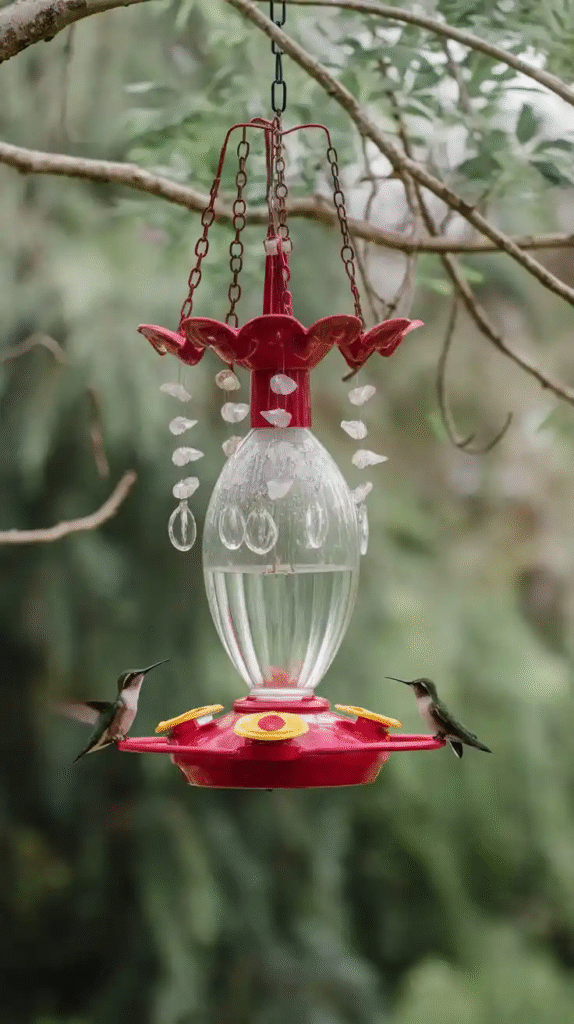
Ever find an old chandelier at a thrift shop or flea market? Remove the electrical parts, replace bulb sockets with small jars, cups, or tubes, and hang it under a tree. The result is a multi-feeder centerpiece, sparkling with vintage charm. It’s like a fancy buffet—just for birds.
9. Copper Coil Feeder
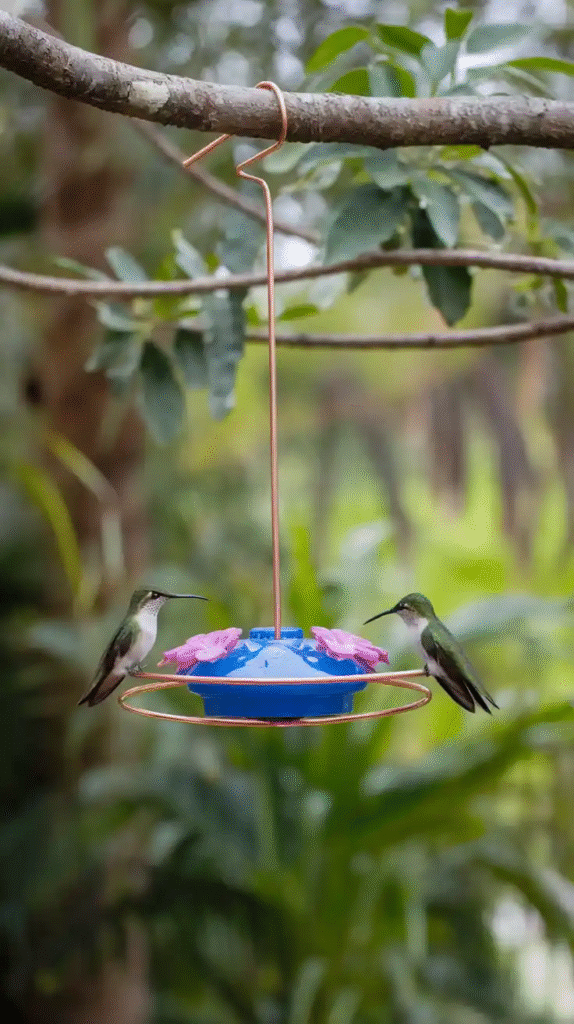
Copper wire isn’t just for electricians. Coil it around a wine bottle or test tube, creating a hanging spiral structure. The copper supports the feeder and gives it an elegant, sculptural look. Add red glass beads for allure. It’s minimalist but still draws the eye—and the birds.
10. Suction Cup Window Feeder
Want to see hummingbirds up close? Really close? Use a small jar or plastic container with a sealed lid, add feeding ports, and attach suction cups to the back. Mount it on a kitchen or living room window. Morning coffee will never be the same when there’s a ruby-throated visitor inches from your face.
11. Terracotta Pot Feeder
Use a small, upside-down terracotta pot as the base. Drill a hole through the center, insert a jar or small container filled with nectar and a feeder tube through the bottom. Hang the whole thing using jute or chain. It gives off that earthy, handmade vibe hummingbirds—and humans—can’t resist.
12. Glass Bulb Feeder
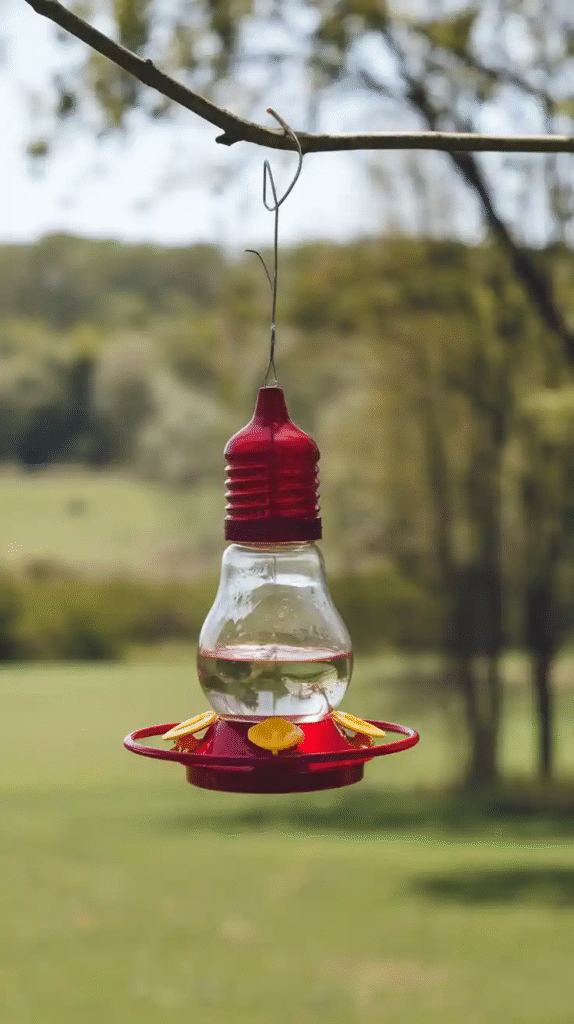
Have any round glass light bulbs or ornaments lying around? Clean them out, fill with nectar, and seal the end with a feeding port or small sponge. Hang them upside down using wire wrap or string. They look like glowing red berries in the sunlight and create an otherworldly effect in the garden.
13. Mini Paint Can Feeder
Miniature paint cans (available at craft stores) make for sturdy, reusable feeders. Drill holes in the lid, insert a feeding port or sponge, and fill with nectar. The metal keeps it cool, and you can decorate it however you like—go rustic or go bold.
14. Ladle Feeder
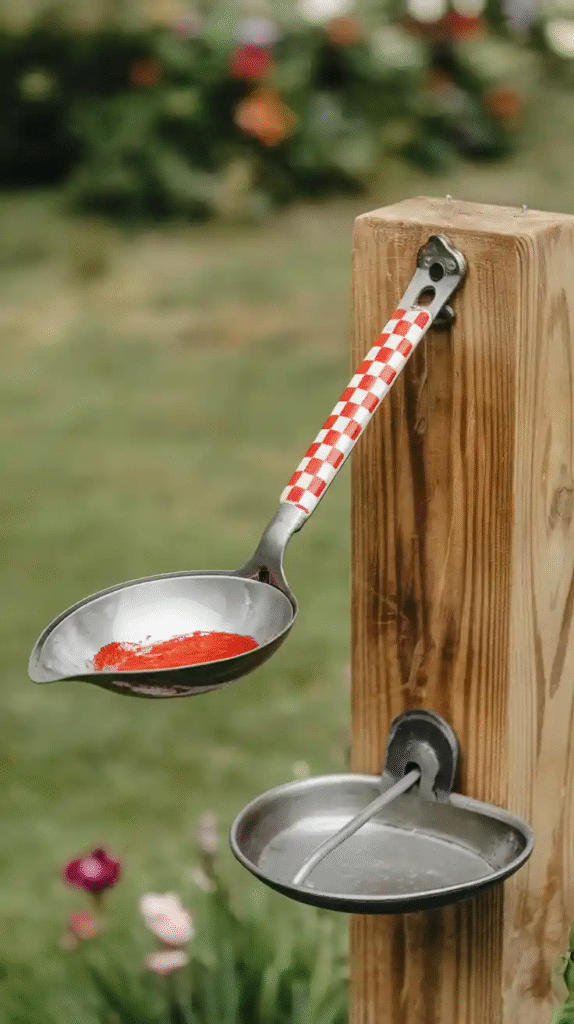
Screw a metal ladle horizontally onto a fence or post, fill the scoop with nectar, and add some artificial red flowers for attraction. It’s an open feeder design, which means you’ll need to clean and refill frequently, but it gives the birds easy access and adds a homey charm.
15. Upcycled Candle Holder Feeder
Got a wrought iron or glass candle holder lying around? Add small jars or cups into the holders, fill them with nectar, and place them around your patio or hang them in trees. It’s like turning your outdoor space into a candlelit dinner for hummingbirds.
16. Gumball Machine Feeder
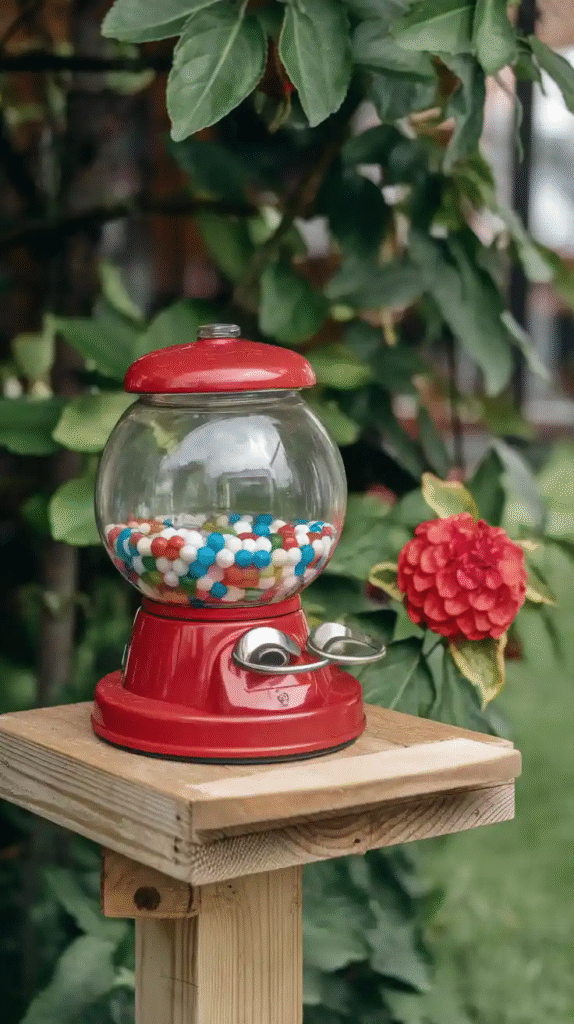
With a little tweaking, an old gumball machine becomes a whimsical feeder. Clean it out, remove any internal mechanisms, and install feeding ports at the bottom. It holds plenty of nectar, and the clear globe makes for easy monitoring. Plus, it’s just plain fun to look at.
17. Hollow Gourd Feeder
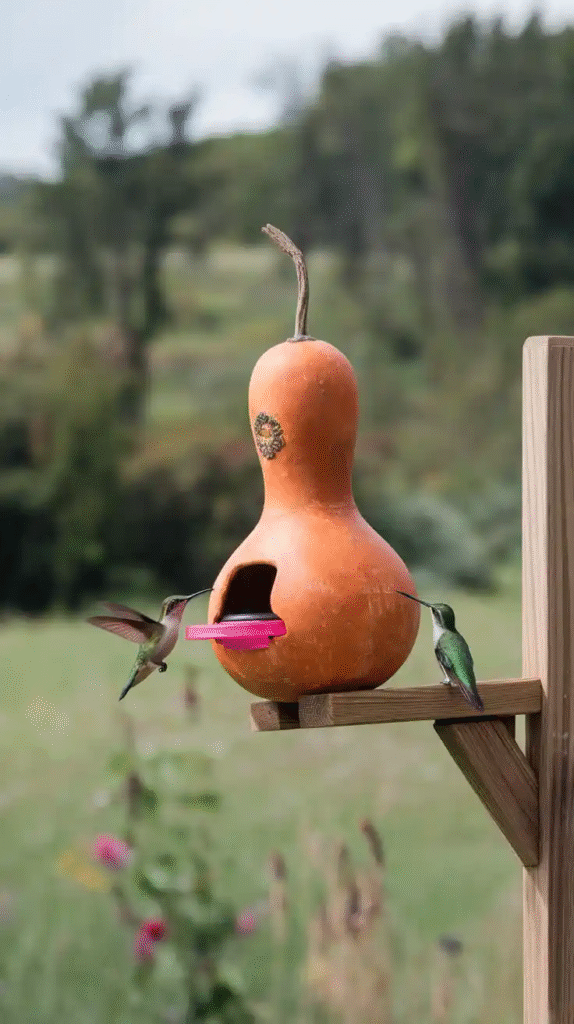
If you grow or buy gourds, this project’s for you. Cut a small opening, clean out the insides, and add a feeder tube or sponge in the base. Paint it red and hang it from a branch. It looks natural, blends into rustic gardens, and keeps the nectar shaded.
18. PVC Pipe Feeder
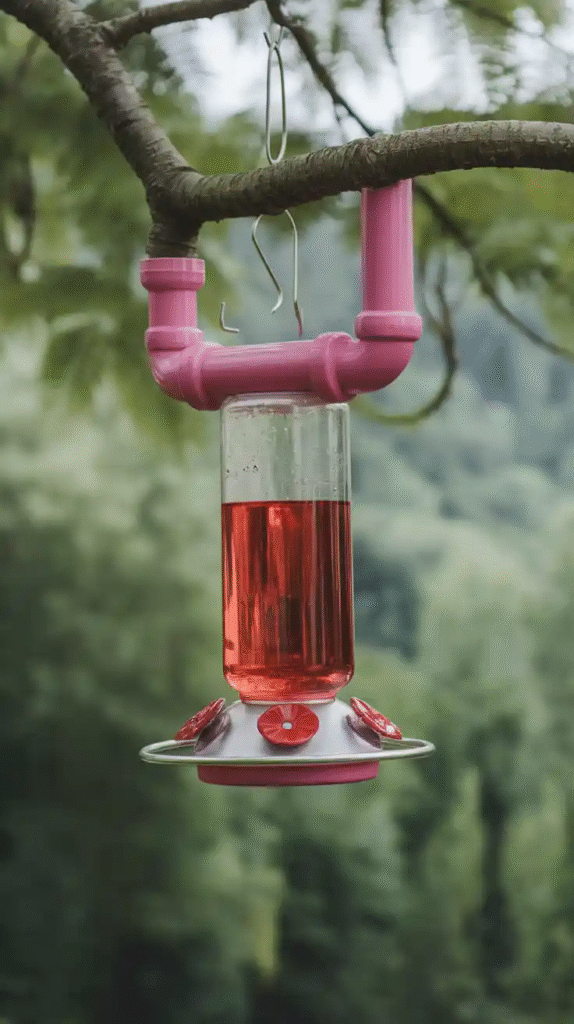
Cut PVC pipe into short vertical lengths, cap the bottom, and drill small feeding holes on the side. Fill with nectar and attach to a post or wall. These are sturdy, weatherproof, and ideal for bulk feeding setups if you’ve got a lot of hummingbird traffic.
19. Spice Jar Feeder
Tiny glass or plastic spice jars make excellent individual feeders. Remove the shaker top, drill feeding holes, and add a colorful cap or flower-shaped guard. Hang several from a single mobile or branch, creating a mini feeding station that feels both personal and purposeful.
20. Thrifted Glassware Feeder
You know those weird-shaped glasses and goblets you always see at secondhand stores? Turn them into one-of-a-kind feeders. Glue them to wooden bases, hang them upside down, or attach them to poles. Each piece becomes its own little sculpture—and each visit from a hummingbird, a reward for your creativity.
21. Cake Pan Feeder
Shallow metal or silicone cake pans make surprisingly effective feeders. Add a central pedestal with a feeding sponge or flower cap, and use floral wire to hang it. It’s open and easy to clean, though you’ll need to keep an eye on rainwater dilution.
22. Soda Can Feeder
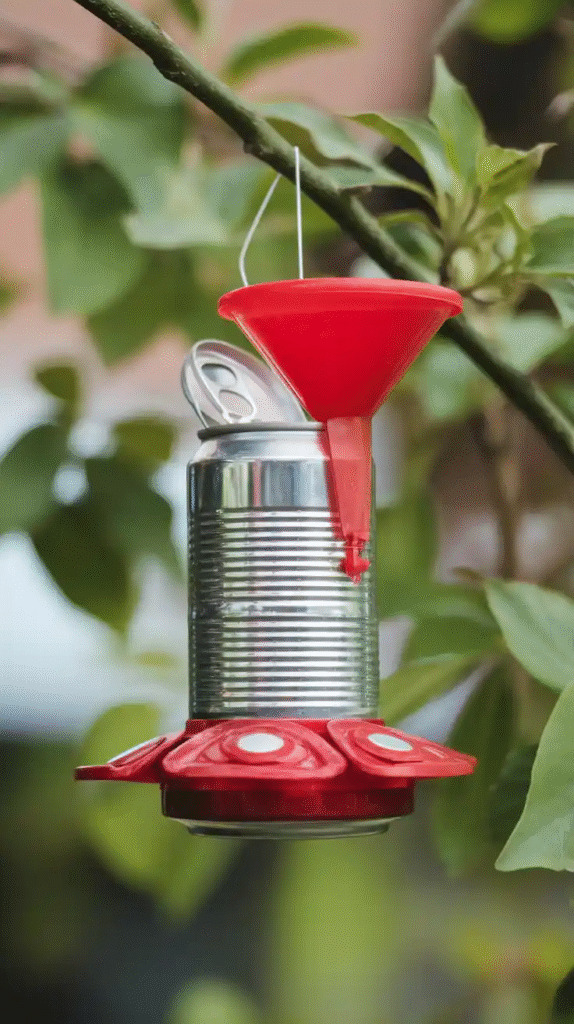
Cut and shape a clean soda can into a flower design, bend the petals outward, and glue a small plastic or glass nectar cup in the center. Add a wire hook for hanging. It’s simple, effective, and gives those throwaway cans a second life.
The Secret Sauce: DIY Nectar

No feeder is complete without the right homemade nectar. Luckily, it’s as easy as making tea: mix 1 part white sugar with 4 parts water, boil for 1–2 minutes, and let it cool. Never use honey, brown sugar, or food coloring. Hummingbirds want pure energy, and this simple mixture gives it to them.
Placement Tips for Maximum Traffic
Want to attract more hummingbirds than your neighbor? Here’s what I’ve learned after years of backyard experimentation: Hang feeders in partial shade to slow nectar spoilage. Use red elements or faux flowers to catch their attention.
Keep feeders 10–15 feet apart—these little guys are territorial. Place them near plants they love, like bee balm, salvia, and honeysuckle. And finally, stay consistent. Hummingbirds remember where they find food and will return year after year.
Cleaning: A Non-Negotiable
No one likes a dirty kitchen, and hummingbirds are no exception. Every 3–5 days (or more often in hot weather), empty and clean your feeder with hot water and a bottle brush. Avoid soap, which can leave a residue. Moldy nectar can make birds sick, and that’s the last thing we want from a labor of love.
Conclusion
You could buy a store-bought feeder. You really could. But building your own? That’s where the magic lives. Every piece you select, every recycled bottle or painted flower, every droplet of nectar—it all becomes part of a living experience.
A DIY hummingbird feeder isn’t just a feeder. It’s an invitation, a tiny red flag that says: “Come visit me. Stay awhile.” And when that shimmering bird zips in out of nowhere and pauses mid-air, you’ll realize it was never just about attracting wildlife—it was about creating something beautiful, meaningful, and a little bit magical with your own hands.
Leave a Reply