
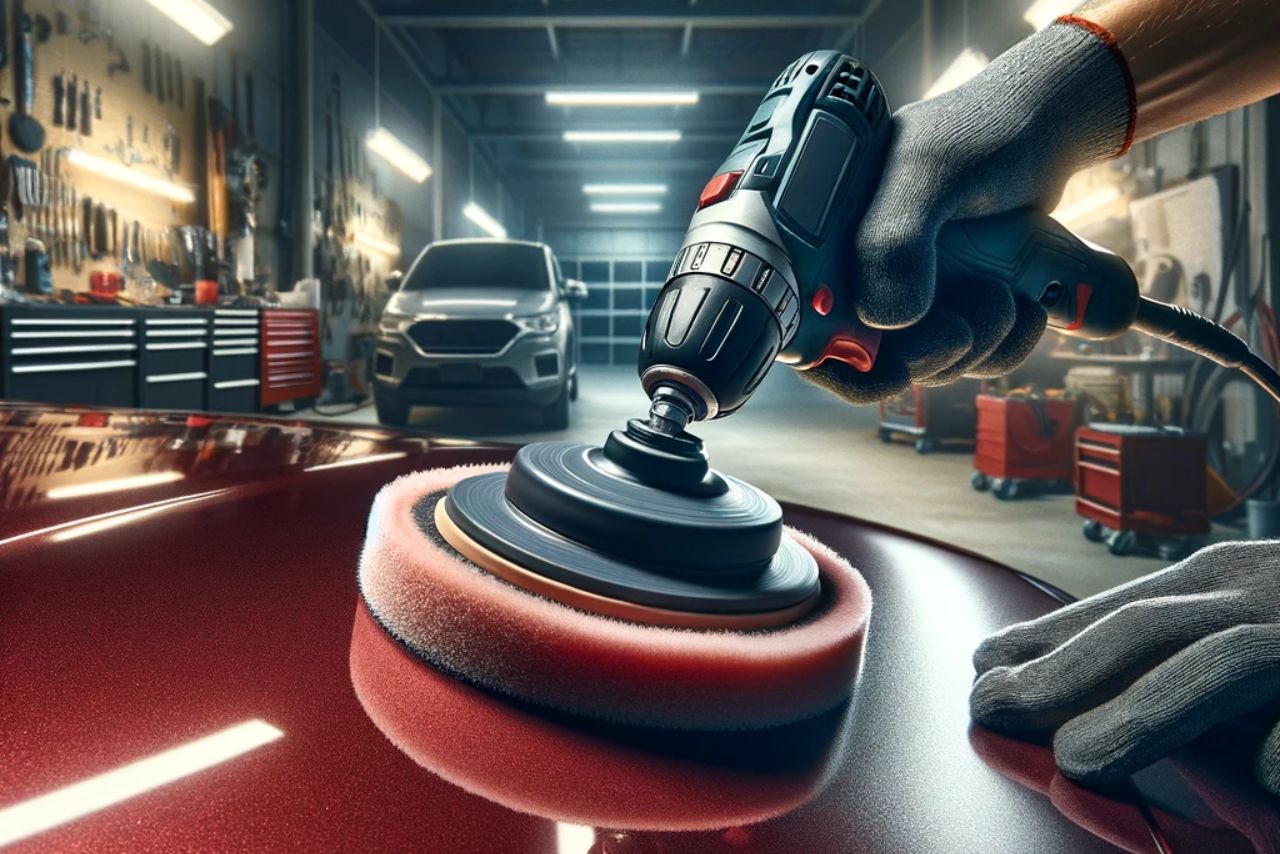
Can You Use a Drill to Polish Your Car? Oh, the eternal quest for that mirror-like shine on your car! You’ve probably tried everything from elbow grease to magic potions, but have you ever thought about grabbing your trusty drill to get the job done? Yep, you heard that right—a drill.
It sounds like a recipe for disaster (or at least a very interesting YouTube video), but with the right approach, using a drill for polishing your car can be a game-changer.
Now, before you dash off to transform your power tool into a buffing machine, let’s dive into the nitty-gritty.
Can you really use a drill to polish your car, or is this just a fast track to a scratched-up paint job? The answer might surprise you, and it’s all about the technique, the attachment, and, of course, a bit of patience.
Stick around as we explore how to achieve that glossy finish without a trip to the auto shop—or ruining your car’s paint in the process!
Can You Use a Drill To Polish Your Car?
SUCCESS
Answer is Yes, you can use a drill to polish your car, but it requires caution. Drills, though rotary tools like polishers, are harder to control and can damage paint due to their shape and high RPM. Practice on a test panel first to avoid potential harm to your vehicle’s paint.
Here in the below image 👇 you can see I asked this question to a expert, and you see what he said in the below image:

Table of Contents
Pros and Cons of Using a Drill for Car Polishing:
Pros
Cons
Best Drill Machine for Car Polishing:
Choosing the Right Attachments for Your Drill:
Polishing Pads
Use soft foam or microfiber pads to prevent scratches.
Polishing Compounds
Opt for low-abrasive compounds to avoid paint damage.
Backing Plates:
Ensure the backing plate matches your pad size for proper attachment.
Speed Settings:
Adjust your drill to lower RPM settings for better control while polishing.
Safety Gear:
Wear safety goggles and gloves to protect yourself from debris and chemicals.
By selecting the right attachments for your drill, you can enhance polishing efficiency while minimizing the risk of damaging your car’s paintwork. Remember, preparation is key when using a drill as a polisher.
Preparing Your Car Before Using a Drill:
By following these steps, you can ensure that your car is properly prepared for polishing with a drill. This preparation will help minimize the risk of damaging your vehicle’s paint and achieve professional-looking results.
Step-by-Step Guide to Polishing Your Car with a Drill:
Prepare Your Workspace
- Choose a well-lit, ventilated area.
- Cover nearby surfaces to avoid splatter.
Gather Your Materials
- Car polish
- Polishing pads
- Microfiber towels
- Safety glasses
Step 1: Prepare Your Car:
First things first, a clean canvas is crucial. Begin with a thorough wash to remove dirt, grime, and other surface contaminants.
This step ensures that you’re working on a clean surface, preventing any particles from causing further damage during the polishing process.
Follow with paint decontamination to remove embedded contaminants for an ultra-smooth finish.
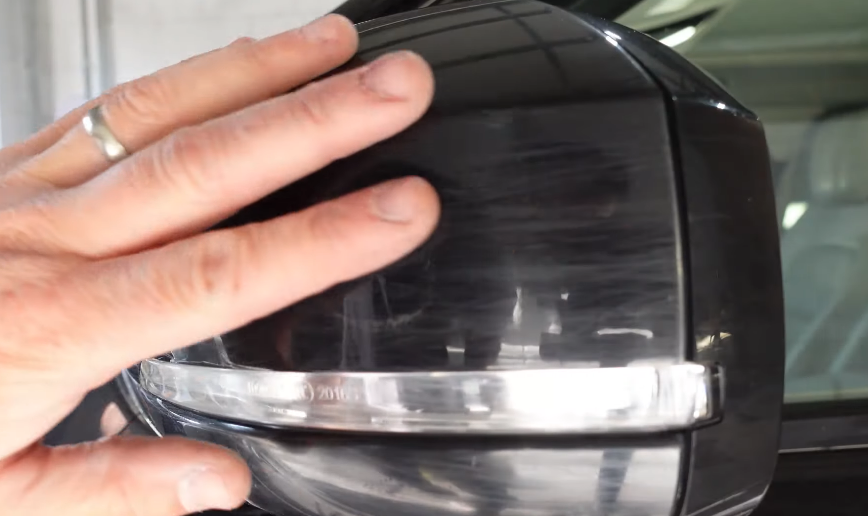
Step 2: Inspect the Paint and Determine Needs:
Inspect your car’s paint to understand the condition it’s in. Look for types of scratches and assess the thickness of the clear coat. Knowing the depth and severity of scratches will help you choose the right polish and pad.
Use a paint thickness gauge to ensure you have enough clear coat to safely polish without causing damage. Generally, you’re safe to polish as long as the clear coat is thicker than 80 microns.
Step 3: Choose Your Tools and Materials:
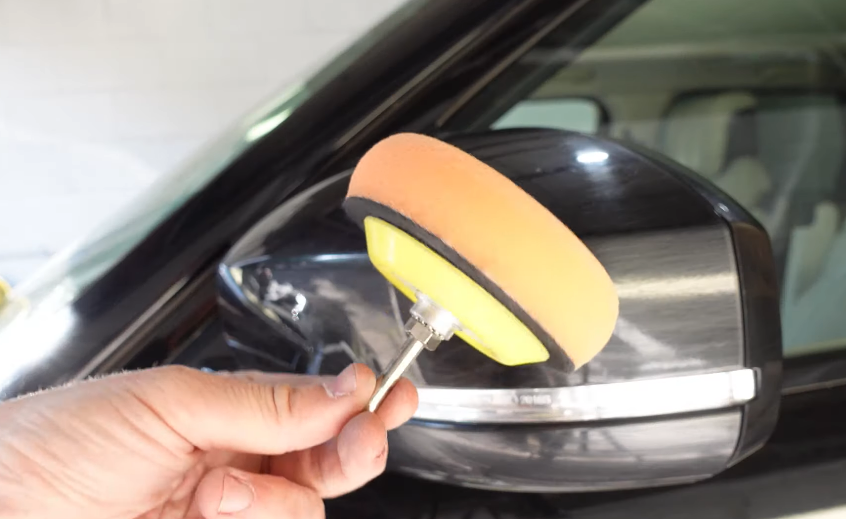
Select a polishing pad and drill attachment suitable for your needs. There are different pads available, each designed for varying levels of abrasiveness, from heavy cutting to fine polishing.
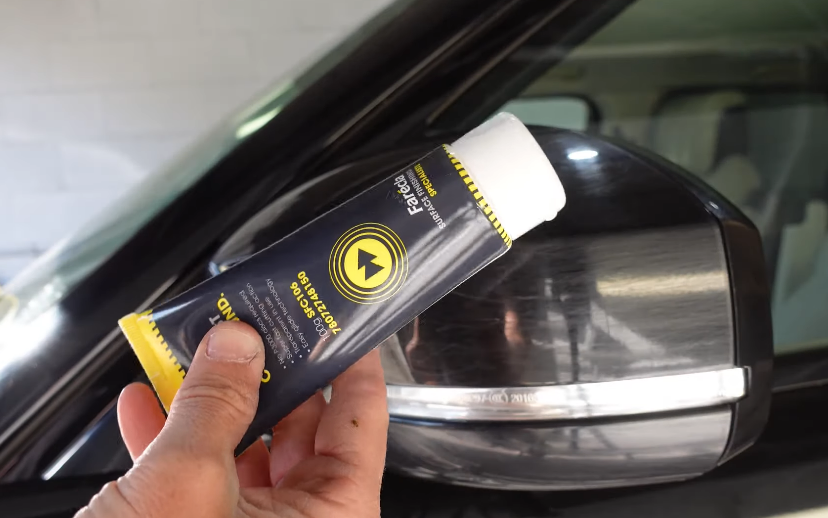
Also, decide on the polish or compound; start with a less abrasive product and only move to more abrasive options if necessary.
Remember, the goal is to use the gentlest method that effectively achieves your desired result.
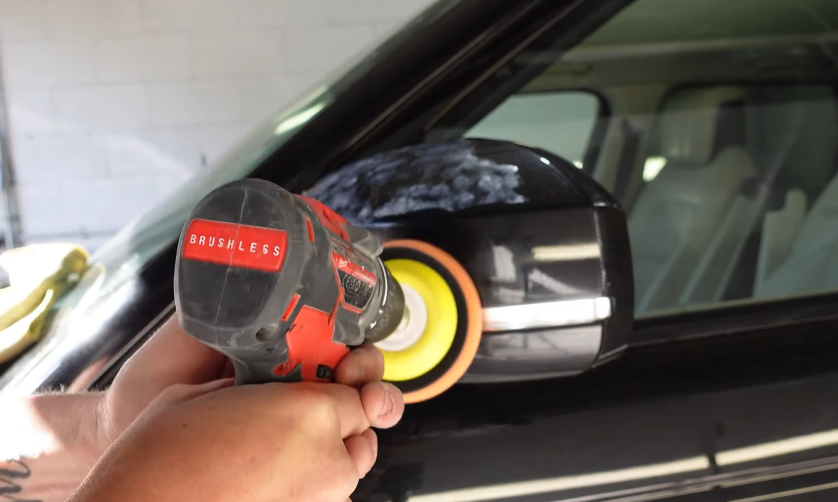
Step 4: Begin Polishing:
Step 5: Wipe and Inspect:
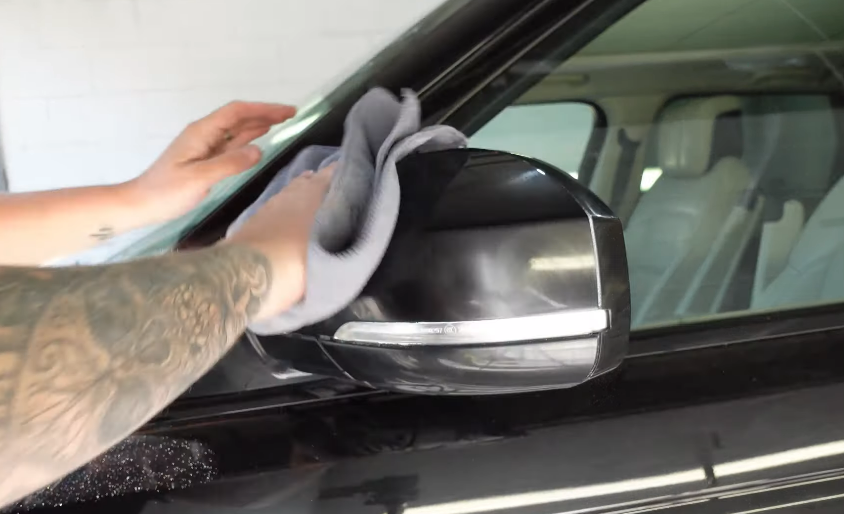
After polishing each section, use a clean microfiber cloth to remove any residue. This step is crucial for checking your progress and ensuring a consistent finish.
Inspecting as you go allows you to adjust your technique as needed, ensuring the best possible finish across the entire vehicle.
Step 6: Clean the Pad:
Regularly cleaning your polishing pad is essential for optimal performance. A clogged pad can reduce effectiveness and even cause damage to your car’s paint.
Clean the pad after completing each section or whenever it becomes saturated with product.
Step 7: Protect the Paint:
Once you’ve achieved the desired level of shine and smoothness, it’s important to protect your hard work.
Applying a wax, sealant, or ceramic coating will protect the paint from UV rays, dirt, and water, extending the life of your polish and keeping your car looking great longer.
Common Mistakes to Avoid:
You Can Also Watch This Video:
Tips for Safely Using a Drill on Your Vehicle:
Remember, practicing proper technique and caution is key when using a drill as a car polisher.
FAQs:
Can I really use a drill to polish my car?
Yes, you can! A drill, when used with the appropriate polishing or buffing attachment, can be an effective tool for polishing your car. This method can save time and reduce the effort required compared to manual polishing. However, it’s crucial to use the right technique and speed to avoid damaging the paint.
What attachments do I need to convert my drill into a polisher?
To convert your drill into a polisher, you’ll need a polishing pad attachment specifically designed for use with a drill. These attachments usually come with a backing plate that securely holds the pad and allows you to easily attach it to your drill. There are various types of pads available, including foam, microfiber, and wool, each suited for different stages of the polishing process.
Is it safe for my car’s paint?
Using a drill for polishing can be safe for your car’s paint if done correctly. The key is to choose the right pad, use the appropriate polish, and maintain a steady, controlled speed to avoid generating excessive heat or creating swirl marks. It’s also important to keep the pad moving and not to apply too much pressure.
What speed should I set my drill to?
The ideal speed depends on the specific polishing task. For removing light scratches or oxidation, a medium speed is usually recommended to effectively work the polish without causing heat buildup. For applying wax or a finishing polish, a lower speed is best. Always start at a lower speed to spread the product evenly before gradually increasing to the desired speed.
How do I prepare my car for polishing with a drill?
Preparation is key to achieving a great finish. Start by thoroughly washing your car to remove any dirt or debris. It’s also a good idea to clay bar the surface to remove any embedded contaminants for a truly smooth base. Ensure the car is dry and ideally work in a shaded area to prevent the polish from drying too quickly.
Can any drill be used for car polishing?
While most standard drills can be adapted for car polishing, it’s best to use a cordless drill with variable speed control for greater flexibility and ease of use. Ensure your drill has enough power and battery life to complete the job, and remember that a drill with a slower low-speed range can be more controllable and less likely to damage the paint.
What are the steps to polish my car with a drill?
Attach the polishing pad to your drill.
Apply a small amount of polish directly to the pad or the car’s surface.
Spread the polish by operating the drill at a low speed.
Gradually increase the speed and work in small sections, using overlapping passes.
Wipe off any residue with a clean microfiber cloth.
Repeat the process with a finer polish or a wax, if desired, using a clean pad.
What are the common mistakes to avoid?
Not keeping the pad flat: This can lead to uneven polishing and swirl marks.
Applying too much pressure: Let the drill and pad do the work to avoid damaging the paint.
Using the drill at too high a speed: This can cause heat buildup, potentially burning the paint.
Not changing pads when needed: Different stages of polishing require different pads. Using the same pad throughout can lead to poor results.
Conclusion and final thoughts
Using a drill to polish your car is possible, but proceed with caution. Drills can be challenging to handle and may cause paint damage due to their shape and high RPM.
To safeguard your vehicle’s paint, it is advisable to practice on a test panel before moving forward. Remember, prevention is better than cure when it comes to maintaining the pristine look of your car.
Leave a Reply